Getting an M1 Cloud Account ID
An M1 Cloud Account ID is required to register your M1 panel to the cloud.
Getting an M1 Cloud Account ID requires ElkRP. This is the computer software you program the M1 with. If you don't have access to ElkRP then you will need to contact your installer or the person who you purchased the M1 from.
To obtain an account ID, simply connect to your M1 panel by the M1XEP (Elthernet Module) using ElkRP.
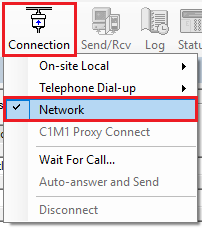
In ElkRP, click on 'Connection' > 'Network' to connect to the system by the elthernet module.
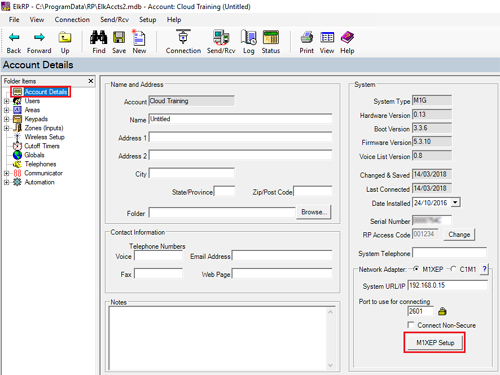
After it has connected, click on the 'M1XEP Setup' button from the 'Accounts Details' screen.
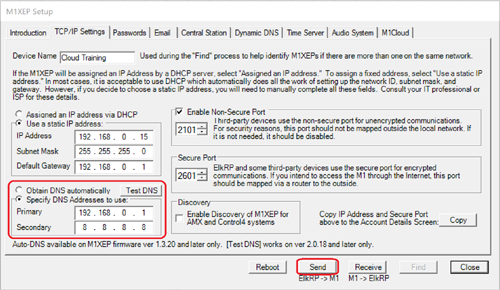
Double check you have a valid DNS server set in your M1XEP from the TCP/IP Settings tab.
Normally the Primary DNS server can be your router's IP address or many people have used 8.8.8.8 in the past. Otherwise, if you contact your internet service provider they will be able to provide these settings which they recommend.
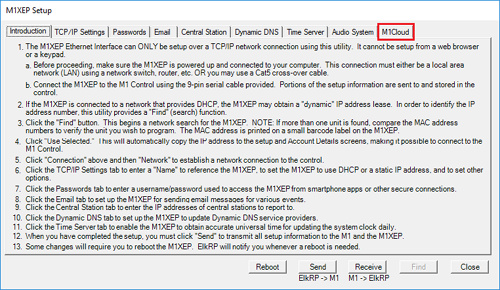
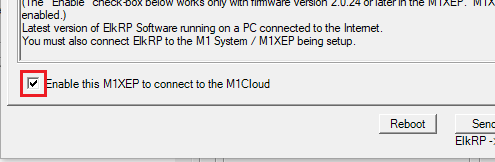
After you have checked and set a valid DNS server, select the M1Cloud Tab from along the top in the M1XEP setup screen.
Tick the checkbox 'Enable this M1XEP to connect to the M1Cloud'.
If asked to reboot the M1XEP click 'OK'
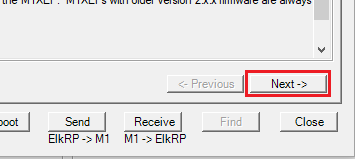
Click 'Next'
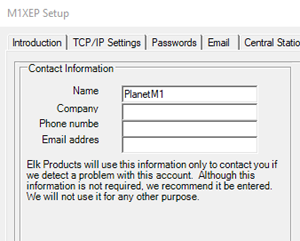
Enter in your contact details for this M1.
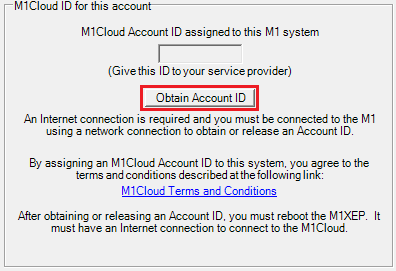
Once your details have been entered in, click on the 'Obtain Account ID' button.
Once the account ID has been obtained, it will display it in the box.
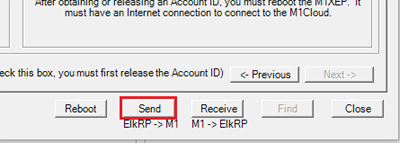
Once you have your account ID, write it down and click on the 'Send' button to send the settings to the M1XEP.
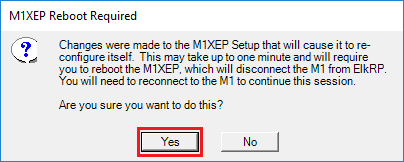
Click on 'Yes' to send the settings to the M1XEP.
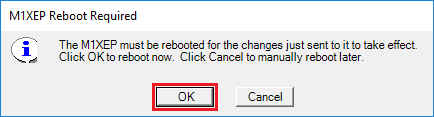
The M1XEP then needs to reboot to apply the changes.
Click on 'OK' to reboot the M1XEP.
You now have your M1 Cloud Account ID to use with our cloud service.
Getting an M1 Cloud Account ID requires ElkRP. This is the computer software you program the M1 with. If you don't have access to ElkRP then you will need to contact your installer or the person who you purchased the M1 from.
To obtain an account ID, simply connect to your M1 panel by the M1XEP (Elthernet Module) using ElkRP.
In ElkRP, click on 'Connection' > 'Network' to connect to the system by the elthernet module.
After it has connected, click on the 'M1XEP Setup' button from the 'Accounts Details' screen.
Double check you have a valid DNS server set in your M1XEP from the TCP/IP Settings tab.
Normally the Primary DNS server can be your router's IP address or many people have used 8.8.8.8 in the past. Otherwise, if you contact your internet service provider they will be able to provide these settings which they recommend.
After you have checked and set a valid DNS server, select the M1Cloud Tab from along the top in the M1XEP setup screen.
Tick the checkbox 'Enable this M1XEP to connect to the M1Cloud'.
If asked to reboot the M1XEP click 'OK'
Click 'Next'
Enter in your contact details for this M1.
Once your details have been entered in, click on the 'Obtain Account ID' button.
Once the account ID has been obtained, it will display it in the box.
Once you have your account ID, write it down and click on the 'Send' button to send the settings to the M1XEP.
Click on 'Yes' to send the settings to the M1XEP.
The M1XEP then needs to reboot to apply the changes.
Click on 'OK' to reboot the M1XEP.
You now have your M1 Cloud Account ID to use with our cloud service.